Favicon: That little doohickey right before your web page address or name. (It’s this  symbol for most Blogger® accounts.)
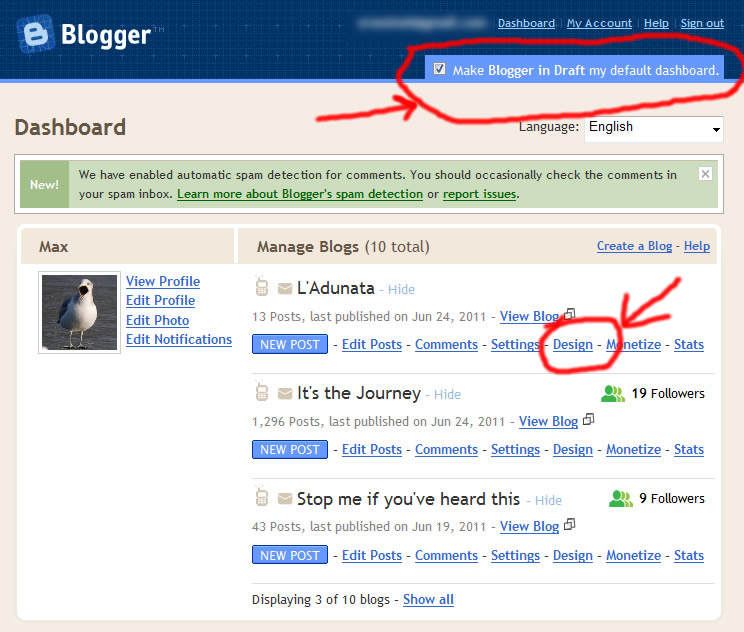
First, you need to set your dashboard to Blogger in Draft. When you log in and get to your dashboard, there is a little check box at the top that will change over for you.
If you are already in Blogger in Draft, or once you have checked it (you may need to log out and back in), then click on the Design link for your blog. At the top there should be a Favicon box, which shows your current favicon and has an Edit link. You have to set up your file before you can do the edit function.![]()
To set up a file for the favicon:
In whichever program you prefer, you will need to make up a square picture that you can save in one of these formats: PNG, JPEG, GIF or BMP. It will also need to be smaller than 2MB. Hint: Do not use a lot of detail, it won’t be noticed because you are going to end up with a file that is 48 pixels square.
Once you have saved your file to your hard drive, you will need to convert it into an ICO file. This link will get you to the online converter I used. Be sure to choose the output to be 48 pixels. Once you have converted it and downloaded it to your hard drive, you are ready to go back to the Blogger design center, click Edit in the Favicon box and follow the directions.
Bingo, you have your own personalized Favicon.


